Projection Map Development 3

From my last post, I mentioned the faces with 4 vertices acting like they had a new edge with a face jutting out. This was because of my aggressive use of the multi-cut tool creating many anomalies across the mesh. This was also fixed by more use of the multi-cut tool and some adjustments to the edges created.

Another new arisen problem was the Arnold 5 renderer.

The usual process with Maya software was to model, texture as a lambert, set the diffuse to 0% and the ambient colour to 100% this would mean you wouldn’t need any lights to light up the scene and it would be fine.

However, with Arnold attempting to render this out would come out black even with addition Arnold lights. Except for 1 mountain.

While playing with the settings I discovered that for the Arnold render to work, the diffuse had to be set to 100% and ambient colour set to 0%. It also required a world light to be added this means that the model had to be a lot more clear as shadows were now being cast in gaps.

However when finally rendered and all anomalies filled the finished draft looked great.

From this test, I could spot a few more black artefacts that I could fix before my next render. I also thought that the front of the mountain had extremely straight lines that just made it look too obvious that it was 3d.

My final thought was Depth of field since I have gone for the camera pull back method it would be best to slowly introduce the whole of the shot through the use of focus.

So I put them together and got my final render.

The final render came out looking absolutely fantastic in my option. A lot better than I could have hoped for. The only way I can improve this would be to start from scratch knowing what I know now and experimenting with different techniques to achieve a better look.
Camera Tracking Development 1

Camtrackday out

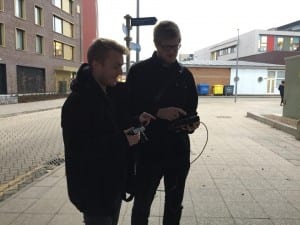
For my camera track, I went out with a group and filmed footage with the intended use for camera tracking. While out there the one thing I learned quickly was light.

Light is essential for tracking as it gives the footage points of contrast to use for tracking markers.

As well as light there was also natural points for tracking markers. small repetitive patterns generate a poor track as the marker will bounce between these points during tracking.

Here are some screens from the footage I had available and why the could or couldn’t be used.

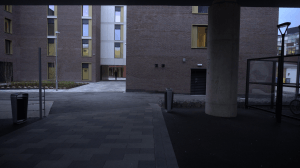
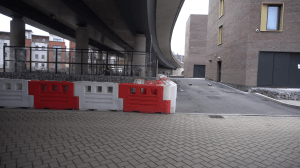
Capture0003058

This shot featured a very dark underpass and extremely repetitive titles on the ground as well as an asphalt with barely any contrast. This shot had very few tracking markers available on the ground. And those that were available jumped often from point to point due to how close the tiles are together

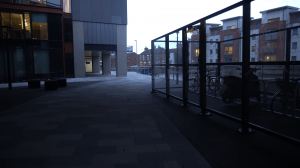
Capture0008007

This footage is incredibly dark and is impossible to get a good floor track due to the lack of contrast.

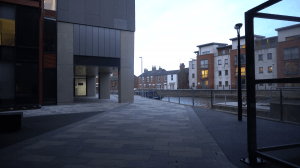
Capture0011085

Once again this footage is incredibly dark. the floor also is very repetitive and due to the low camera intersections between the tiles would very easily confuse the tracking markers.

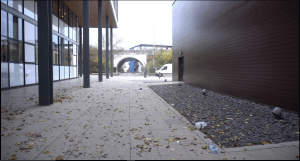
Capture0013016

This footage isn’t as dark as the last but is still dark enough to cause continuous track errors. Even in attempts to manually assist the track slight blurring in the footage caused any tracks to be immediately be lost.

CamTrackFootage

This is the footage I went for. The light is good, and the leaves along the floor allow to maintain tracking markers due to their colour and contrast differences with the ground.

Here is the footage of me tracking.

During Tracking I managed to get this down to a 0.2 margin of error and added some geometry to show the track in action.

To Do

– Look into lighting in blender to get a better lit model

– Create a model to add to the scene

Projection Mapping Development 2

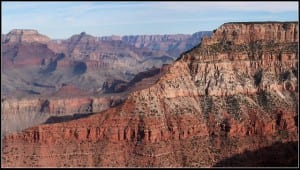
For my final projection mapping, I decided to create some mountains using projection mapping as I wanted to push myself from simple square polygons of my earlier test.

The image I chose was by Franck Laboue on flicker (Link)

12079768545_75c76c9b38_z

With this, I want to achieve a shot of the camera passing over the mountain showing everything behind it, such as a shot of a heroes journey to the furthest mountains. or the reverse effect as if the main character is walking along these cliffs as the camera pans out to show how far they have left to go. This is something I will attempt as I progress through the development of this.

I followed everything I knew so far about projection mapping setting up the camera and perspective to match the scene, and I just began to slowly build up the mountain. I wasn’t sure how to go about building it up from scratch so I just kept going with what I thought was working.

One thing I’m noticing is some quad faces aren’t flat between the 4 vertices and are acting like there is another edge there. This is something I should look into fixing as I finish the first mountain and see how to fix it as I go on with the second.

It’s still early into the development into this mountains so not many problems have appeared otherwise. So here is a clip so far!

The Final Project Plan

For the final video of this project I will make;

A 90-second sequence containing three 10 seconds visual effects shots and 20-second breakdowns of each.

The first shot will be a showcase of my projection mapping skill using mountains with subtle camera movement to give the illusion of 3D

The second shot will be shot will be a showcase of my matchmaking ability by adding CG with lighting into moving footage.

The third shot will showcase my ability to create photorealistic models and textures by having a still image rendered with a 3D model.


The reason for only 90 seconds is because industry professionals want to be able to know what you can do as fast as possible.

If one of the shots is shorter than 10 seconds such as the rendered image, time will be added to the breakdown to keep within the 90 seconds.

While creating each one of these, full development videos will be uploaded of the process, and development of the shots will be posted on the LSFM digibods Facebook page for feedback to help develop them to their final stage.

With 4 weeks left before hand in. I plan to use 1 week for each shot development using the final week for extra time for additions and development.

Camera Tracking Development

Tutorials I followed to accomplish this

Here is the video of me creating the camera track using the same video as in the tutorial

Here is the final clip I produced

Blenders Tracking is time consuming but the results and level of control over each tracking marker allows for an almost perfect track mine came out to 0.17 solve error. With higher quality footage a better track could easily be made.

To expand upon this i need to look into object tracking and how to make the object look like it belongs in the real world I also need to look into how to use masks when tracking.

The Auto tracking feature may be useful later on. I should also use more track points for my actual footage and use the graph editor to remove outliers.